内核,启动!
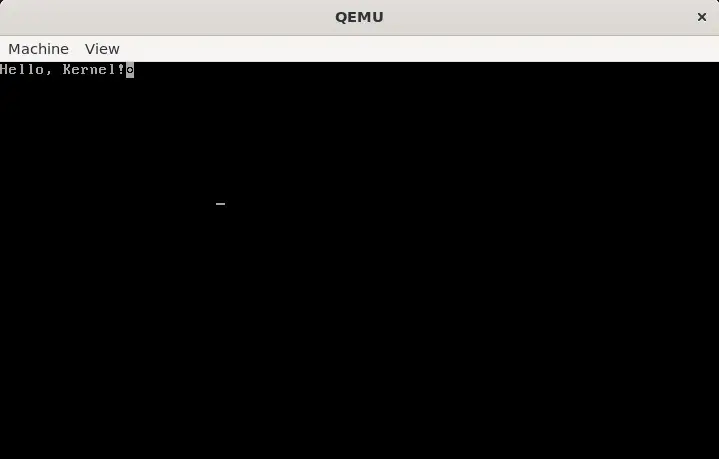
Hello, Kernel!
我们暂时不讨论更复杂的东西,先看看怎么打印出一些东西。
当前的系统没有任何显示驱动,我们只能继续向 VGA 的显存写入字符来显示。这一过程和之前 bootloader 几乎是一样的,但是用 C 语言写起来要简单多了:
#define VGA_BASE 0xb8000
#define VGA_SIZE (80 * 25)

void print_str(const char* str) {
    char* vga = (char*)0xb8000;
    while (*str) {
        *vga = *str;
        str++;
        vga++;
        *vga = 0x07;
        vga++;
    }
}

void clear_screen() {
    char* vga = (char*)0xb8000;
    for (int i = 0; i < VGA_SIZE; i++) {
        *vga = 0;
        vga++;
        *vga = 0x07;
        vga++;
    }
}

int main() {
    clear_screen();
    print_str("Hello, Kernel!\n");
    return 0;
}
我们在这里实现了打印字符串的函数和清屏函数,然后在 main 函数中调用了它们。
现在,问题来了:我们的 bootloader 如何加载并运行这个内核程序?答案很简单,直接 call main 就可以了:
... ; 省略前面的代码

BOOT_SECTOR_EXTENDED_64:
; 64 位长模式
BEGIN_LM_64:
[bits 64]

  mov rdi, WHITE_ON_BLUE_64
  call print_clear_64
  mov rsi, MSG_LONG_MODE
  call print_64

  call KERNEL_START

.boot_hold_64:
  jmp $

%include "long_mode/print.asm"
%include "long_mode/print_clear.asm"

VGA_BASE_64       equ 0x000b8000  ; VGA 显示内存地址
VGA_LIMIT_64      equ 80 * 25 * 2 ; VGA 显示内存地址限制
WHITE_ON_BLUE_64  equ 0x1f        ; 白色文本,蓝色背景

KERNEL_START      equ 0x8200     ; 内核入口地址

MSG_LONG_MODE db "Jumped to 64-bit long mode", 0

times 512 - ($ - BOOT_SECTOR_EXTENDED_64) db 0 ; 填充 0
[bits 64]
[extern main]

global _start

_start:
  call main
  jmp $
我们后期只需要把 entry.asm 编译得到的二进制文件放到 0x8200 处即可。
目前情况下,我们的程序编译要经过如下步骤:
-
编译
boot/boot.asm得到dist/boot/boot.bin:cd boot && nasm -f bin boot.asm -o ../dist/boot/boot.bin -
编译
boot/entry.asm得到dist/boot/entry.bin:cd boot && nasm -f elf64 entry.asm -o ../dist/boot/entry.bin -
编译
init/main.c得到dist/init/main.o:cd init && gcc -c main.c -o ../dist/init/main.o -ffreestanding -ggdb -
链接
dist/init/main.o和dist/boot/entry.bin得到dist/kernel/kernel.bin:cd dist && ld -Ttext 0x8200 --oformat binary -o kernel/kernel.bin init/main.o boot/entry.bin -
合并
dist/boot/boot.bin和dist/kernel/kernel.bin得到dist/MiniOS.img:cd dist && cat boot/boot.bin kernel/kernel.bin > MiniOS.img
然后使用 qemu 运行 MiniOS.img:
qemu-system-x86_64 -drive format=raw,file=dist/MiniOS.img
当然,你会很不愉快地发现,编译是通过了,但无法正常运行。
读取扇区数
你是否想起来,之前在写 bootloader 的时候,我们读取了磁盘上的前 3 个扇区,把整个 bootloader 加载进了内存。我们的内核此时没有被加载进来,当然无法运行。
但是,内核的大小是不确定的。我们当然可以在编译完内核后,查看其大小,然后修改 bootloader 的代码,把内核加载进内存。但是这样做太麻烦了。我们需要把这个流程自动化。我们可以在 boot.asm 的最顶端定义一个变量,用来存储内核的大小,然后读取这个大小的磁盘来加载内核。在编译时,通过脚本计算内核的大小,然后把这个值写入到对应的内存中。
[org 0x7c00]

jmp BEGIN_RM_16

KERNEL_SIZE db 0 ; 内核大小

; 16 位实模式
BEGIN_RM_16:
[bits 16]

  mov bp, 0x0500        ; 将栈指针移动到安全位置
  mov sp, bp            ; 使其向着 256 字节的 BIOS Data Area 增长

  mov [BOOT_DRIVE], dl

  mov bx, 0x7e00        ; 将数据存储在 512 字节的 Loaded Boot Sector
  mov cl, 0x02          ; 从第 2 个扇区开始
  mov dh, [KERNEL_SIZE] ; 读取 n 个扇区
  add dh, 2             ; 加上 2 个扇区
  mov dl, [BOOT_DRIVE]  ; 读取的驱动器号
  call disk_load_16     ; 读取磁盘数据

  mov bx, MSG_REAL_MODE ; 打印模式信息
  call print_16

  call elevate_32       ; 进入 32 位保护模式

.boot_hold_16:
  jmp $                 ; 根本执行不到这里

... ; 省略后面的代码
接下来,只要计算 kernel.bin 占据的扇区数:
kernel_size_bytes=$(shell wc -c < dist/kernel.bin);
kernel_size_sectors=$$(( ($$kernel_size_bytes + 511) / 512 ));
printf %02x $$kernel_size_sectors | xxd -r -p | dd of=dist/boot/boot.bin bs=1 seek=2 count=1 conv=notrunc;
这段代码首先计算了 kernel.bin 占据了多少个 512 字节的扇区,然后把这个值写入到 boot.bin 的第 3 个字节中——也就是 KERNEL_SIZE 的位置。
我们运行这个脚本,然后再合并 boot.bin 和 kernel.bin,就可以正常运行了。
自动化编译
现在,我们的编译过程已经非常复杂,我们需要编译 boot.asm,entry.asm,main.c,然后链接、修改、合并。此外,我们还缺少 debug 等功能。
我们可以把所有过程写成 Makefile,这样就可以一键编译了:
CC = gcc
LD = ld
AS = nasm
QEMU = qemu-system-x86_64
GDB = gdb

CFLAGS = -ffreestanding -ggdb -Iinclude
LDFLAGS = -Ttext 0x8200
LDFLAGS_BIN = ${LDFLAGS} --oformat binary
ASFLAGS = -f elf64

C_SOURCES = $(wildcard init/*.c kernel/*.c drivers/*.c)
HEADERS = $(wildcard include/*.h)
OBJ = $(patsubst %.c, dist/kernel/%.o, ${C_SOURCES})

.PHONY: all clean run debug

all: clean directories dist/boot/boot.bin dist/kernel/kernel.bin dist/kernel.elf dist/MiniOS.img

directories:
	@mkdir -p dist/boot
	@mkdir -p dist/kernel/init
	@mkdir -p dist/kernel/kernel
	@mkdir -p dist/kernel/drivers

dist/boot/boot.bin: boot/boot.asm
	cd boot && ${AS} -f bin -o ../$@ boot.asm

dist/boot/entry.o: boot/entry.asm
	${AS} ${ASFLAGS} -o $@ $^

dist/kernel/kernel.bin: dist/boot/entry.o ${OBJ}
	${LD} ${LDFLAGS_BIN} -o $@ $^

dist/kernel.elf: dist/boot/entry.o ${OBJ}
	${LD} ${LDFLAGS} -o $@ $^

dist/kernel/%.o: %.c ${HEADERS}
	${CC} ${CFLAGS} -o $@ -c $<

dist/MiniOS.img: dist/boot/boot.bin dist/kernel/kernel.bin
	kernel_size_bytes=$(shell wc -c < dist/kernel/kernel.bin); \
	kernel_size_sectors=$$(( ($$kernel_size_bytes + 511) / 512 )); \
	printf %02x $$kernel_size_sectors | xxd -r -p | dd of=dist/boot/boot.bin bs=1 seek=2 count=1 conv=notrunc;
	cat $^ > $@;

clean:
	@rm -rf dist

run: dist/MiniOS.img
	@${QEMU} -drive format=raw,file=$^

# Run QEMU with GDB
debug: dist/MiniOS.img dist/kernel.elf
	@${QEMU} -drive format=raw,file=dist/MiniOS.img -s -S & ${GDB} -ex "target remote localhost:1234" -ex "symbol-file dist/kernel.elf"
这里,我们超前编写了一些代码,省得以后还要多次改动。
现在,我们只需要运行 make,就可以编译我们的系统了。如果要运行,只需要运行 make run;如果要调试,只需要运行 make debug。
如果你已经测试没有问题,便可以删掉 boot/build.sh 和 boot/debug.sh 了。
Comments